 GoDetect™ View Instructions
GoDetect™ View Test and Camera Setup Instructions
- Secure the camera to the base, attach any necessary extension tubes, and attach the lens to the camera.
- Setup the camera such that the view of the camera can clearly see the area of interest for the machine used.
- The material should be in focus and the area around the material should be visible.
- Camera setup and focusing may be easier with auxiliary light and/or a low frame rate like 24 and a very long exposure.
- For reaction determination involving jetting, you should have the edge of the anvil or the edge of the bulkhead in view.
- The recommended frame rate for the MBOM Impact to identify jetting incidents of 1000 in/sec or greater is 2000 fps.<\li>
- The recommended frame rate for the ABL Friction to identify jetting at the same speed is 1500 fps.
- See additional resources on the ET Users Group website (https://www.etusersgroup.org/library/reaction-detection-discussion/).
- The recommended resolution is 512 x 256 or 256 x 256 depending on the machine.
- The fstop on the camera should be set to an appropriate value so that the test material and function of the machine can be seen.
- Verify that the trigger is functioning.
- Ensure that the coax cable from the trigger cable from the machine is connected to the BNC connector on the camera labeled as “trigger”.
- Manually start the recording of the camera in the PCC software. The red light will light up on the back of the camera indicating the camera is recording.
- Run the machine as if completing a trial.
- The camera should have triggered, and the red light on the back of the camera blinks and turns off and in the PCC software the trigger button that was previously green is now grey. This confirms that the current trigger is functioning.
- Create the appropriate folders.
- If testing PETN on the ABL Friction machine, make sure there is a PETN folder in an ABL Friction folder in the View folder in the GoDetectData folder:
- e.g. C:\Users\yourspecificidname\GoDetectData\View\ABL Friction\PETN.
- If there isn't a PETN folder in the ABL Friction folder, create one.
- For other machines, first create a folder with the machine name within the View folder
- In the PCC software click on the Continous Recording tab.
- In that menu, click 'Browse' and navigate to the desired folder that you just created in the substance folder for that machine.
- Type Run@4.cine in the file name box. The software will create a new cine file each time the camera is triggered with the first one labeled Run0001.cine. The prefix for all the files does not have to be named 'Run'.
- In the Save Cine dialogue, click the drop down menu for Range Option and choose User Defined and type the [-start,finsih]. Where the start and finish numbers
are determined by you the user to make sure that the event is captured sufficiently witout saving more the 200 frames typically.
- For example, if the trigger event is typically 10 frames ahead of the event then it is recommended you save frames -20 to 30. You will enter this in the bottom of the save file window prior to starting testing.
- Click save.
- Click the activate check box.
- Complete the test with the substance and machine at the energy level and click the reload button such that the http://localhost/godetectview page reloads and it automatically pulls up the video of the event. Note that there is a delay as the images are extracted from the cine file for display. The delay can be 10-20 seconds depending on the number of images in the cine file. See further details below.
GoDetect™ View GUI Instructions
- Navigate to the http://localhost/godetectview page. The most recent substance and test should be propagated to the dropdowns.
- Click the "Display Video:" button. Note that depending on the number of images in the cine file, you will have to wait
10-20 seconds for the images to be exptracted from the cine file.

- Enter the energy of the trial and enter any notes.
- Click the Go or No Go button.
- Repeat the process again to capture a test with the continuous recording and reload the /godetectview page to automatically populate the dropdowns with the most recent trial.

Note that:
- Individual images of the .cine file are extracted to generate the video shown on this page. Those extracted images are stored in the respective Docker container ./app/statics/video folder.
- The cine video saved by the Phantom Control software must be such that the event is shown or you wont see what is needed on this page (see Step 5 above).
- The individual trial results displayed on the page can be exported by clicking the Export Data button. Results are exported in csv fomat here: ./GoDetectData/view_notes.csv.
- The files in the running Docker container./app/ folder are necessary for the proper function of the web application (GoDetect ver 8).
- GoDetect version 8 was developed using Chrome. Other browsers may not work as well.
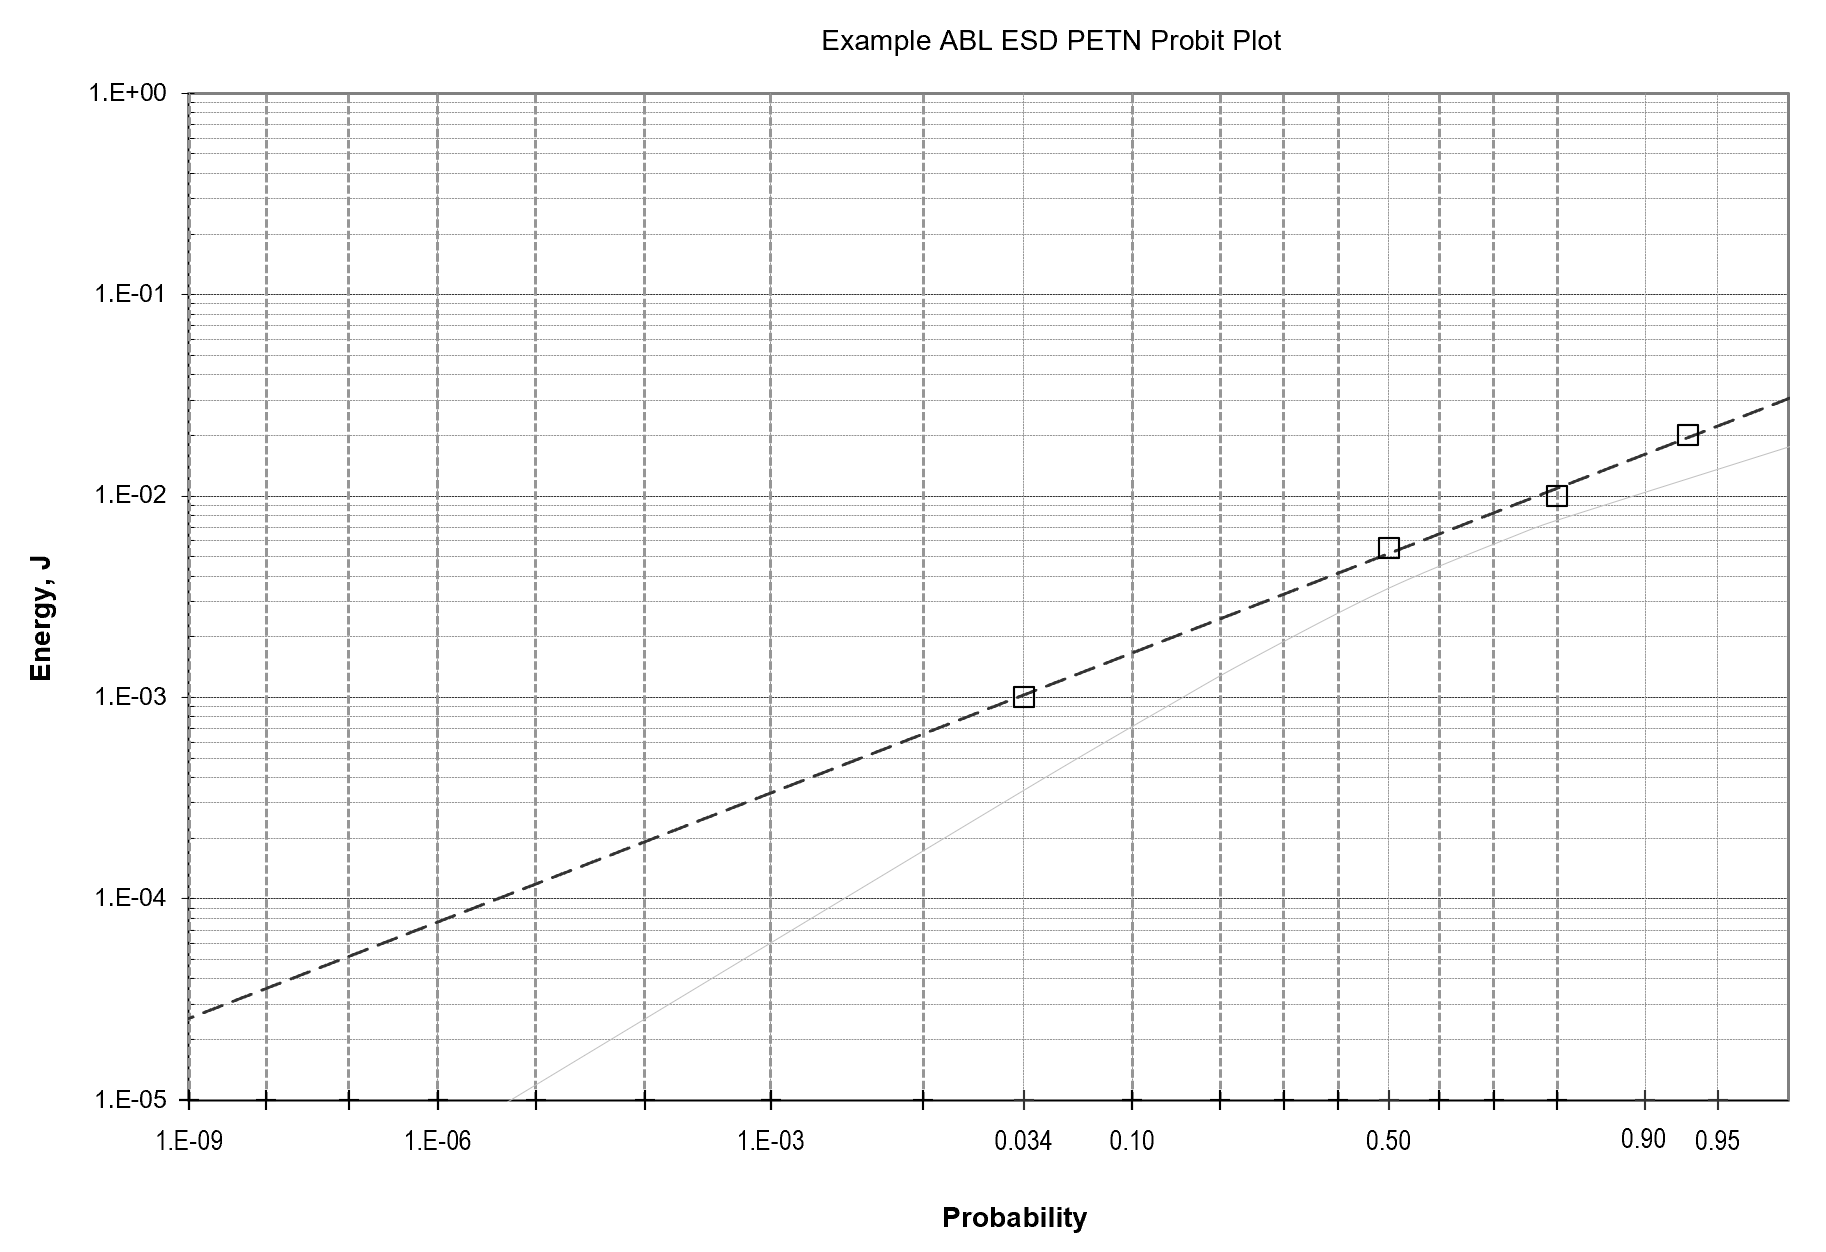
GoDetect™ Characteristic Curves or Probit Plots
The characteristic curve or probit plot relates the energy of the impetus to the probability of a reaction event. Such a curve can be easily generated by first opening the SMSPROBITTemplate_V1.xls file under the GoDetectData folder. The table generated in the GoDetect™ web application for either ESD or View showing the setting, number of Go's, and number of Trials is then simply highlighted with the mouse and then copied into the excel sheet. The setting can then be modified to give the appropriate number value and the probit curve determined and plotted by clicking the Calculate button.
 |
 |
| Probit sheet. | Example ABL ESD probit plot. |